So you’ve read the tutorial on creating stop motion animations with Entangle and avconv, and now you want to make some animations, but you haven’t got one of those fancy digital cameras. No sweat! You can transform an ordinary scanner into your own personal animation studio. Scanners are much cheaper and easier to get a hold of than digital cameras. Heck, if you have a printer there’s a very good chance you also have a scanner. Unlike our animation method with Entangle, much of the work to be done with the scanner method doesn’t involve your computer at all. We’ll need to break out our analog friends, pen and paper, for some old-fashioned sketch time.
Each individual frame will need to be drawn by hand. You can use a glass table, a window, or some other makeshift lightbox to copy elements from the previous frame, saving you a little time and keeping your drawings consistent. For your sanity, I suggest keeping your animation simple. Try working with a few simple shapes to start with. A fluid animation would ideally be played back at twenty four frames per second. That is a crazy amount of drawings for just a few seconds of animation. We can compile our animations at a much lower frame rate to save us the extra work. I generally shoot for twelve frames per second, because this provides a fairly smooth animation and cuts the work load in half.
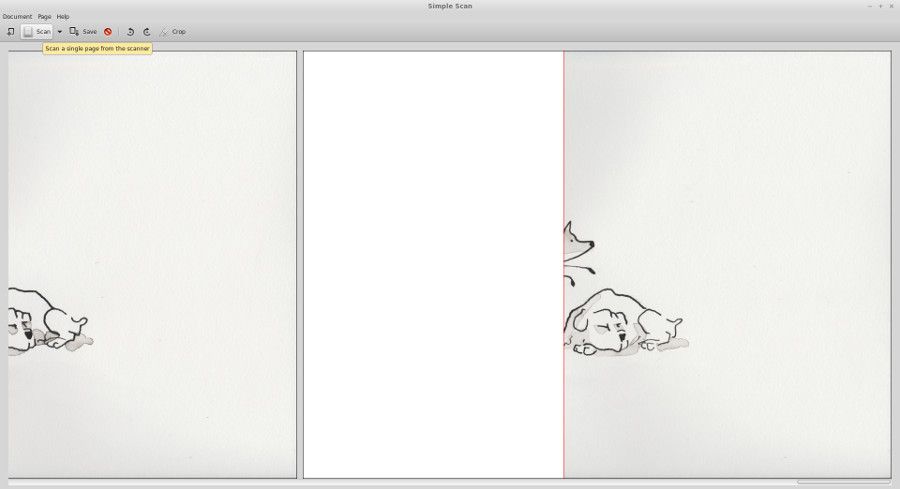
When you are satisfied with your drawings, we can begin the scanning process. I recommend a nifty little program called Simple Scan. There’s a good chance it is either included with your Linux distribution, or available in the software repos. If not, any image scanning software will do. Open the Simple Scan preferences and ensure that the quality slider is set to maximum, and the resolution is set to a reasonably high value. Anything over 300 dpi is probably too extreme.

Place the first frame of your animation on the scanner bed, and hit the scan button. You may need to rotate the resultant image in Simple Scan to get it oriented correctly. You may also wish to set a crop window, removing the excess scanner bed. It is not important that your crop be accurate, but it is important that you set it on the first frame and never adjust it again for the remainder of your scanning.

Finish scanning each one of your frames one-by one until completion.

When you are done, save the images to a folder of your choice, giving them a simple name such as “frame”. The rest of the process is very similar to how we compiled a stop motion animation made with Entangle. First we need to decide how to crop our video. The easiest way I’ve found to determine the crop parameters is with Gimp, so open any one of your frames in Gimp. With the crop tool selected, check the “Fixed” option and set it to “Aspect ratio”. For the sake of demonstration, I’m assuming we are going to output a 1080p video, so in the field just below the “Fixed” checkbox, enter “16:9”. Drag out a selection on the image for the crop you intend to use for your video, but don’t execute the crop.

Put Gimp aside and navigate to the folder containing your scanned images via the command line. The time for compiling your animation is now!
avconv -f image2 -r 18 -i frame-%02d.jpg -vf crop=3420:1924:36:344,scale=1920:1080 -flags:v gray -r:v 30000/1001 -c:v libx264 -qp 0 -preset medium -an -y "animation.mkv"Generally when converting input with avconv, you would only need to specify the path to the file with the -i parameter. With image sequences, we need to supply a little more information.
-f image2 Indicates that the input is an image sequence.
-r 18 is the input framerate. So if you were shooting for 24 frames per second, you would put 24 here. You may want to try compiling several times at different input frame rates to find the one that suits your animation best.
-i frame-%02d.jpg is the naming scheme for your image sequence. “frame-%02d.jpg” tells avconv that your files all begin with the word “frame-” followed by a sequential number that is two digits long, contains leading zeros, and ends with “.jpg”.
The -vf parameter is a comma separated list of video filters. This is where the real magic happens. First we need to crop the image using the data we gathered with Gimp’s crop tool. The format of the crop filter is “crop=output width:output height:x:y. The output width and height are the “size” parameters from Gimp’s crop tool, and the x and y are the “position” parameters. So based on the crop settings I chose in Gimp, my avconv crop filter would be crop=3420:1924:36:344.
Surely you noticed that the output width and height are rather large. Normally I would set the video size with the -s:v parameter, but it doesn’t play nice with the crop filter, so we’ll need to use a scale filter to properly size the output. This one is pretty straightforward, it’s formated as “scale=output width:output height”. Since we are outputting our video to 1080p, the scale filter would be “scale=1920:1080”.
-flags:v gray formats the video output as grayscale. If your animation incorporates color, you’ll want to remove this option.
The remaining parameters are for your video codec. You could set these to anything you want, but I chose to export a lossless, x264 encoded mkv file at 29.976 frames per second.
Now we can finally watch our animations. It sure is a lot of work, but isn’t it worth it?